Many IITM Online BSc degree students are from non programming background. So students can use a user friendly programming practice app which focuses on basic programming.
[This project was submitted as a part of 'APP-A-THON' competition.]
The IITM Online BSc degree program is open to students from all backgrounds. For a student who is new to programming, it is challenging. Students can utilize a user-friendly programming practice tool that focuses on basic programming to overcome this difficulty and fear.
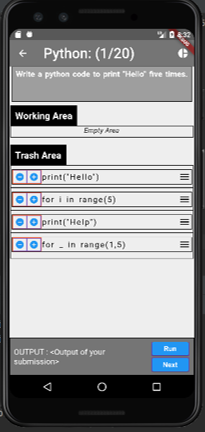
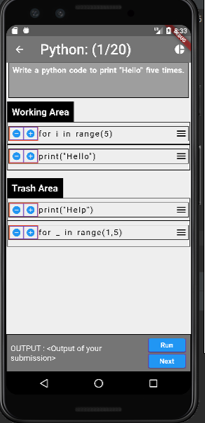
In this app, the user can answer basic Python coding problems by rearranging code lines, eliminating unnecessary lines, and altering line indents to obtain the desired result. Users can also practice questions from other languages such as HTML, Java, CSS, JS, SQL, C++, and Linux commands in the quiz section.
This app is made with Flutter and Firebase Cloud Database in Android Studio.
Here is a high-level summary of the project. The basic steps followed by me for this app building are as follows:
Steps:
User Data Flow Structure
App Database Model
Wireframe Design
App Architecture
Files Tree Diagram
App Logo
App Screens (Programming)
Binding All Together
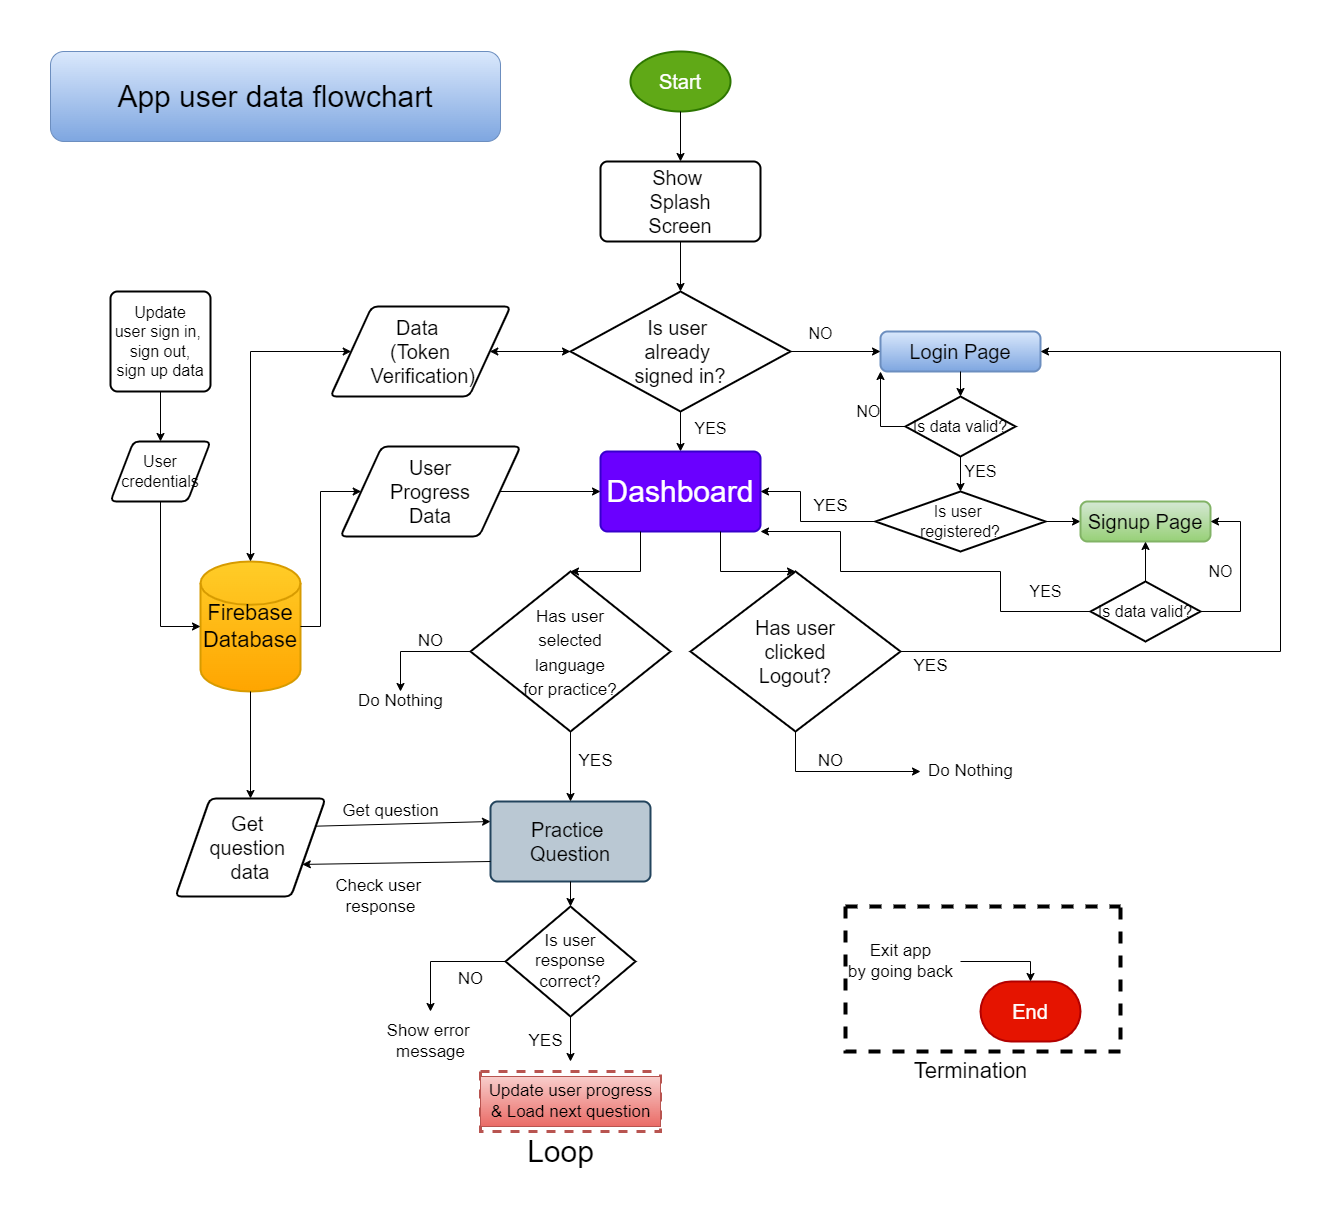
Step 1: User Data Flow Structure
The data flow structure should be decided now that the core problem has been discovered and the solution has been decided.
The app will launch and the user will see a splash screen. The 'Splash' screen displays the app's name and logo for a few seconds before moving on to the next screen.
The 'Login' screen will appear if a user is not logged in. From this screen, the user can 'Register' or 'Login'.
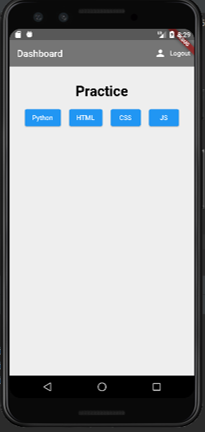
The 'Dashboard' screen comes next. There will be programming practice options here, as well as a 'Reset Progress' button and a display of the user's current progress in each language. The user can choose a language and begin practicing immediately.
[Fig 1.1] User Data Flow Structure
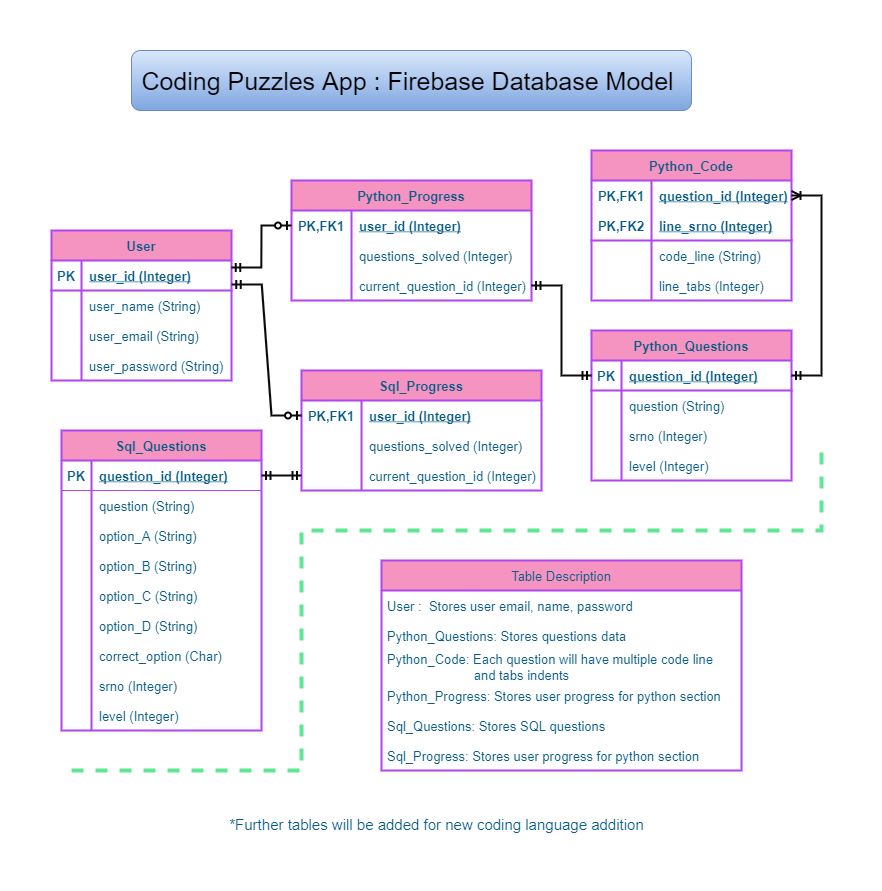
Step 2: App Database Model
This app's data is saved in the Firebase database. It's completely free for little projects and quite easy to use.
The database model depicted in Figure 2.1 in table format for clarity. It's a NoSQL (Not Only SQL) database. The real database structure is shown in Figures 2.2 and 2.3.
[Fig 2.1] App Database Model
[Fig 2.2] Database Screenshot - 1
[Fig 2.3] Database Screenshot - 2
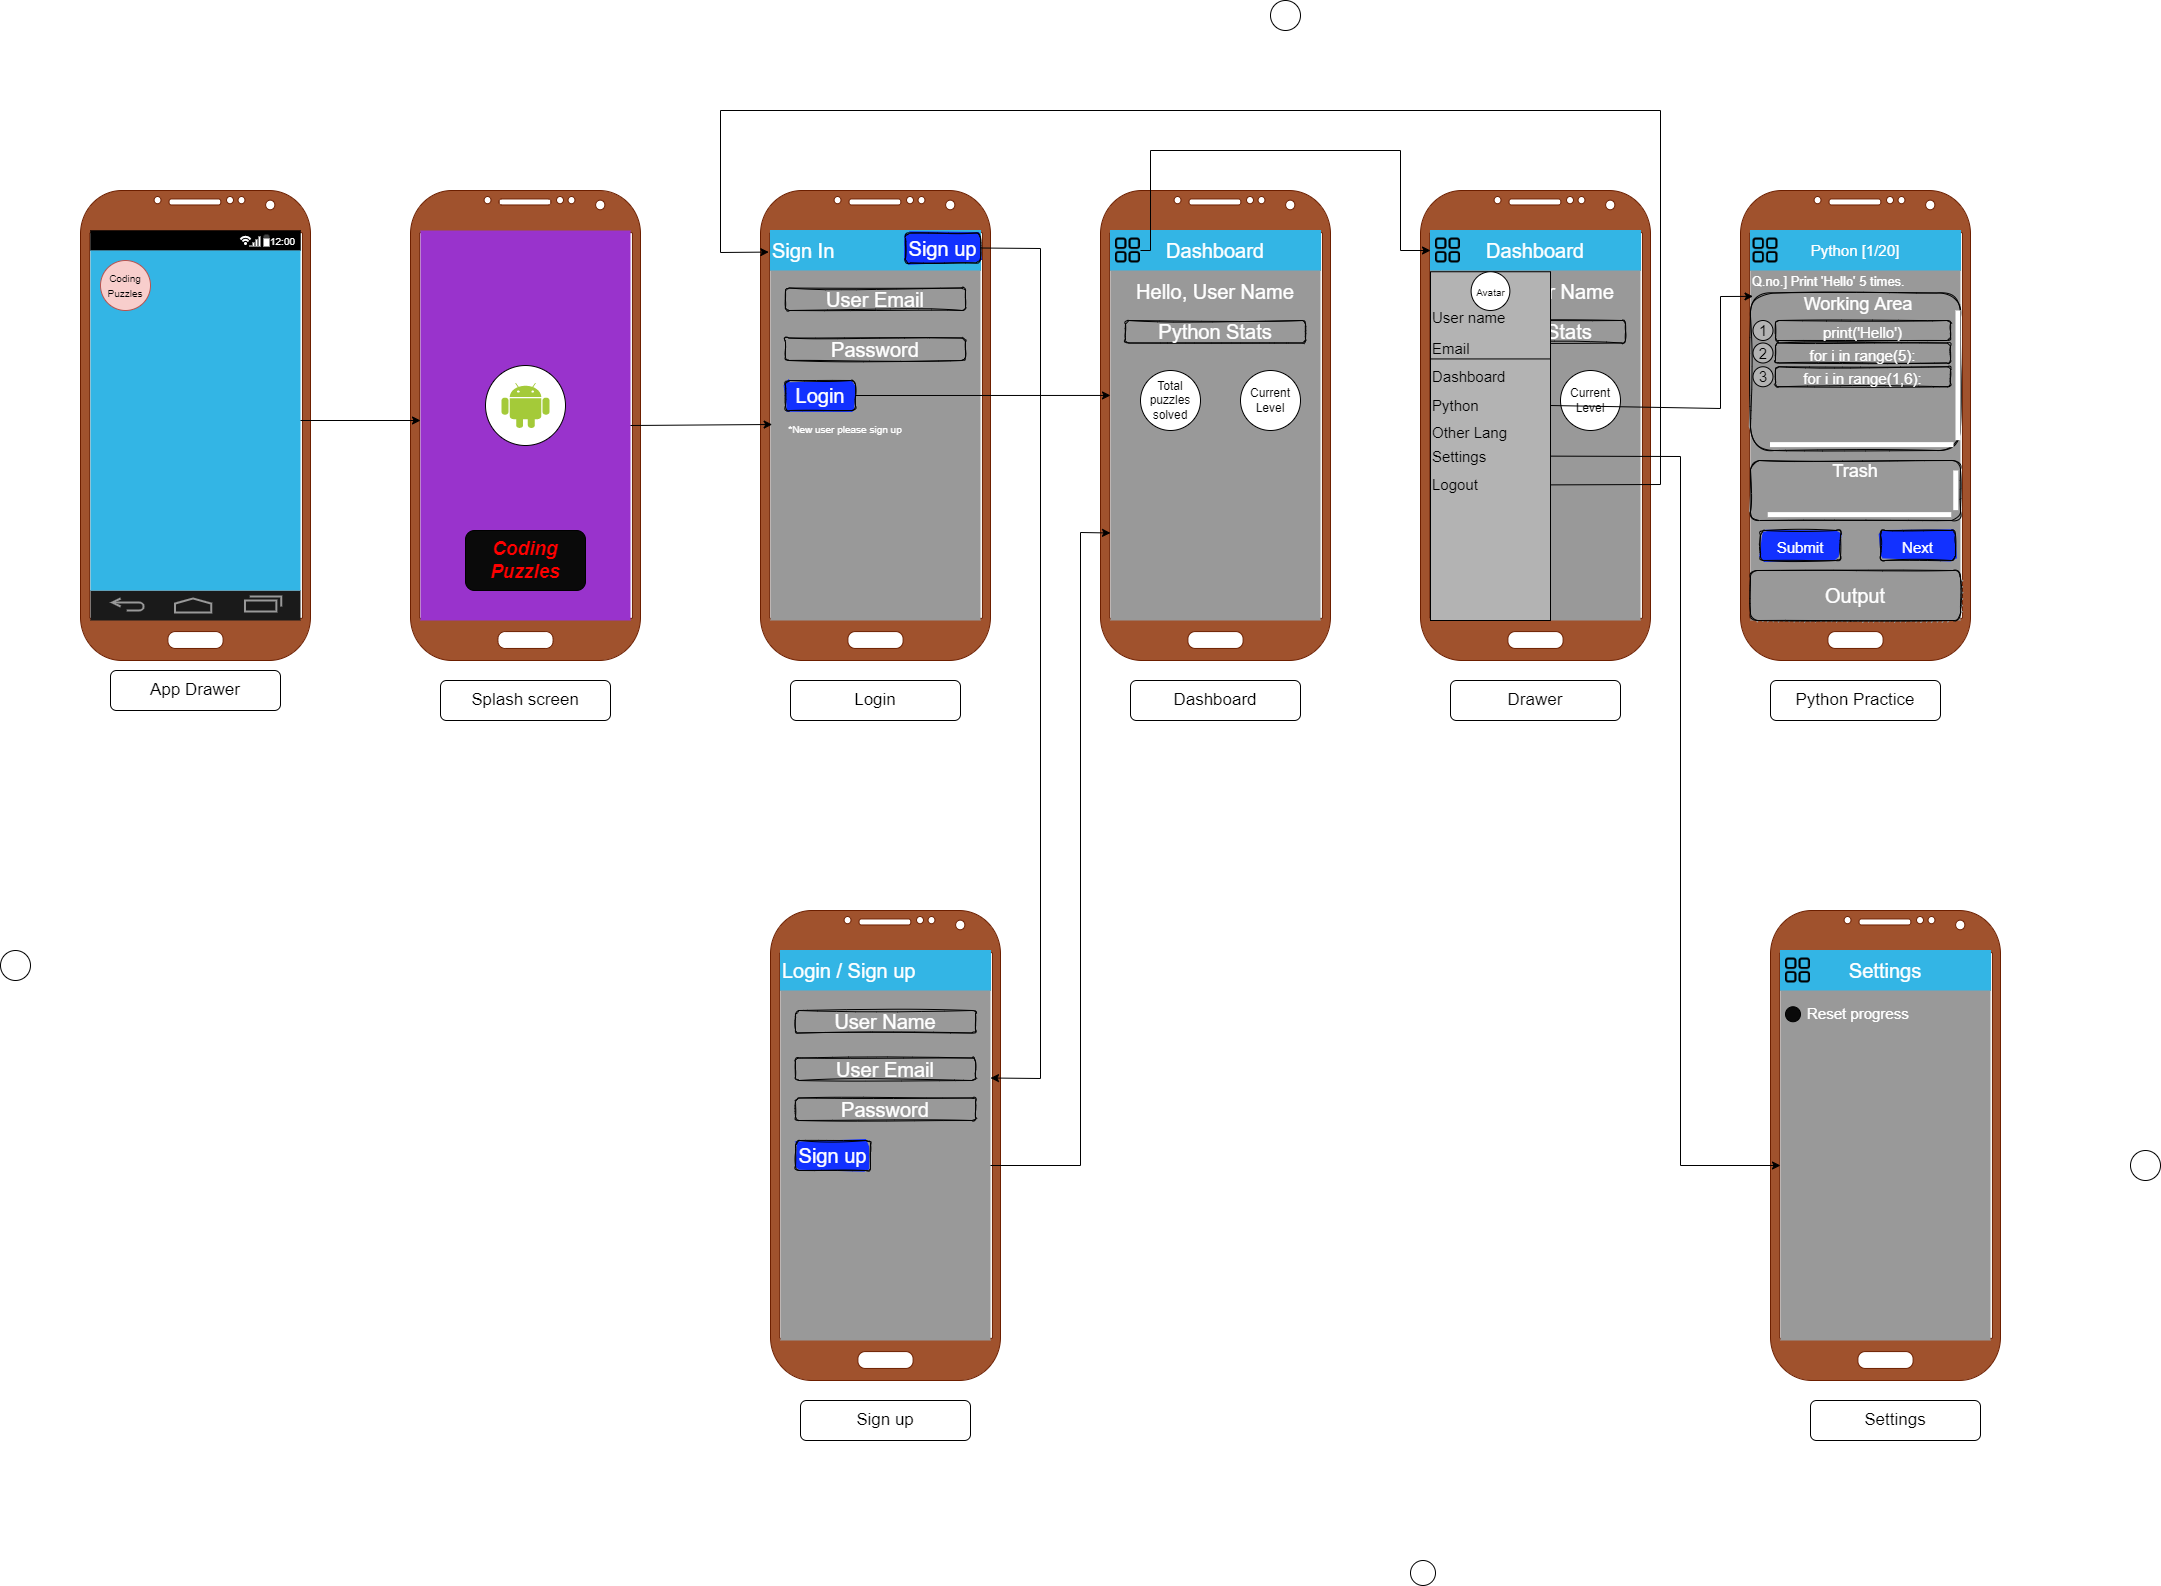
Step 3: Wireframe Design
A wireframe is a schematic that can be used to determine the app's structure. It consists of a number of screens arranged in the order in which they will be displayed to the user, as well as the material that will be displayed on each screen. It's also useful for programming.
The app's basic wireframe has been decided. It is shown in Figure 3.1.
[Fig 3.1] Wireframe Design
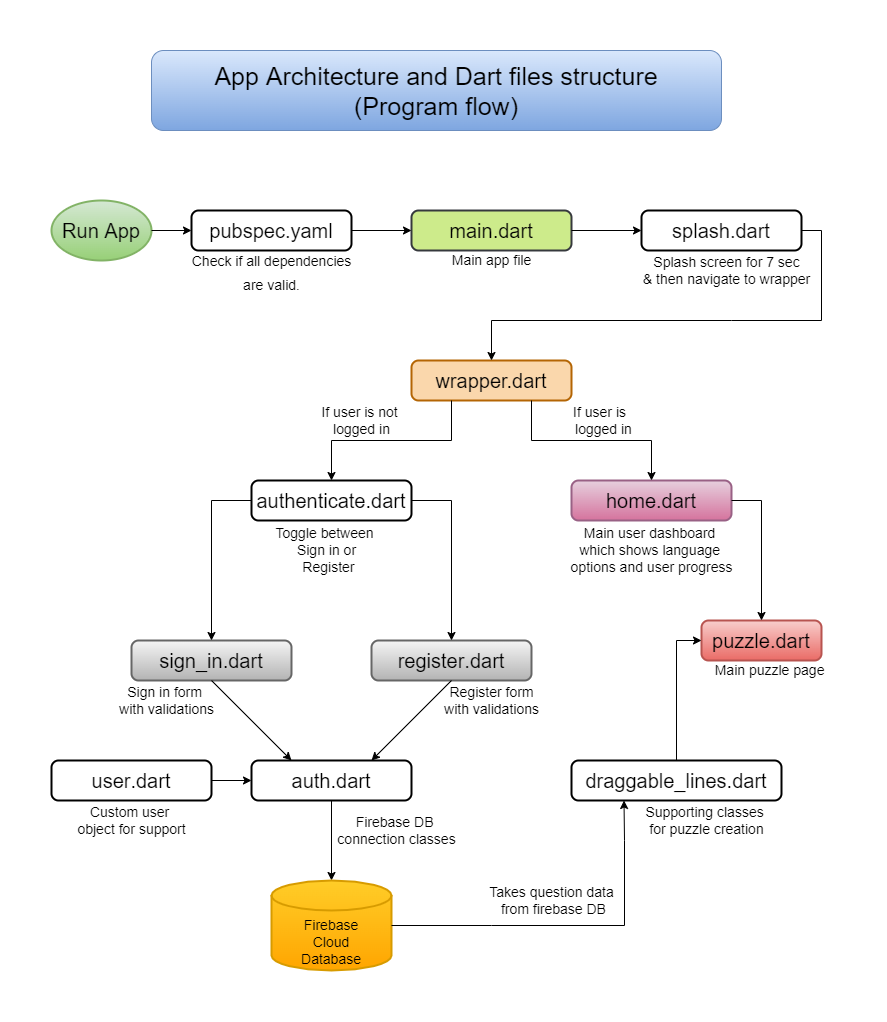
Step 4: App Architecture
App architecture is nothing but a program flow diagram. It's made up of .dart files that are placed in the sequence in which they'll run and show the user a screen.
This comes in handy when organising files in project folders. It is shown in Figure 4.1.
[Fig 4.1] App Architecture
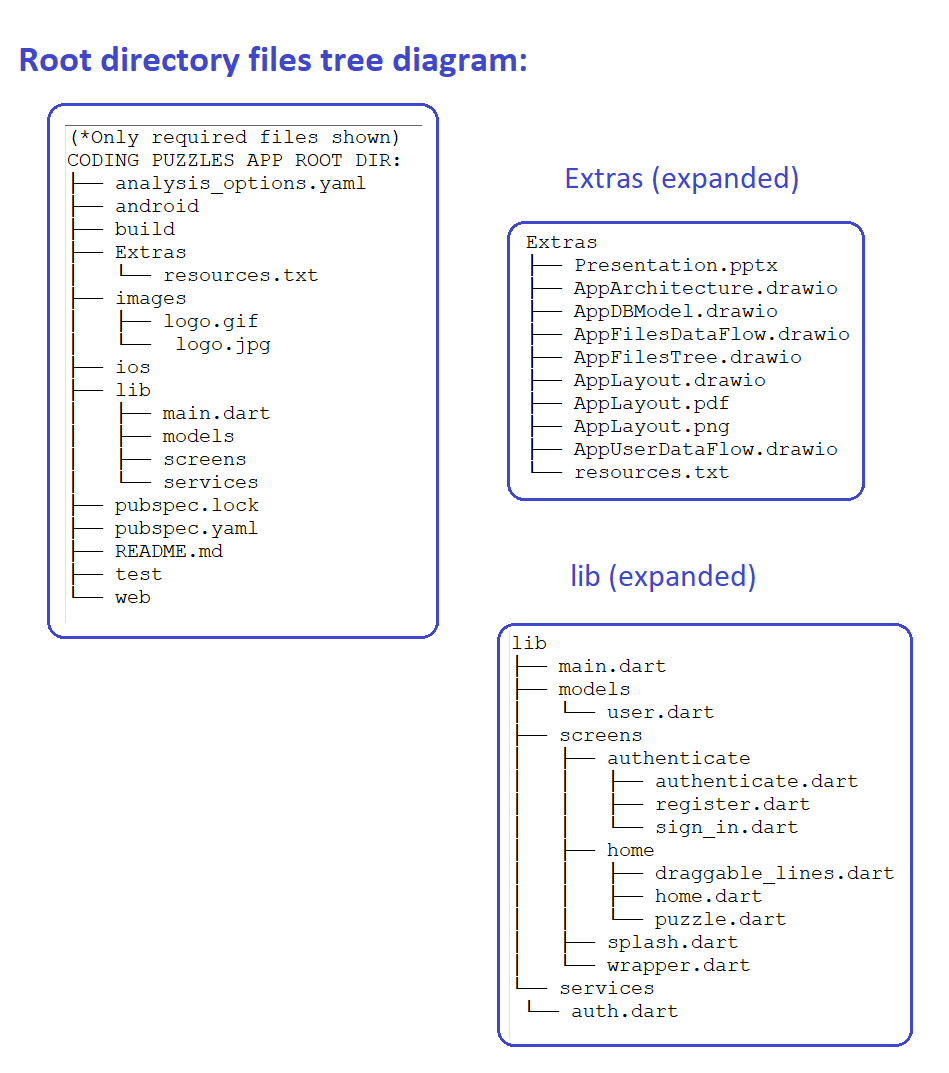
Step 5: Files Tree Diagram
After the program's file structure has been determined, the appropriate files can be created. And this is where the app's programming begins. The files tree structure is shown in Figure 5.1.
[Fig 5.1] Files Tree Diagram
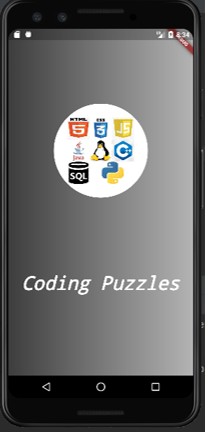
Step 6: App Logo
This is a optional step. The app logo used for this app is shown in Figure 6.1 in .jpg format and in Figure 6.2 in .gif format. Its made in Python with the help of Pillow and OpenCV libraries.
[Fig 6.1] App logo - JPG format
[Fig 6.2] App logo - GIF format
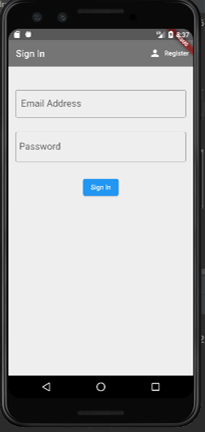
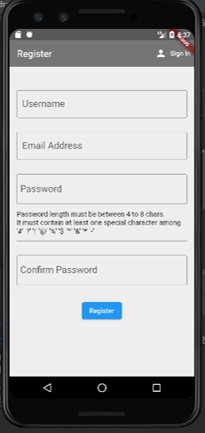
Step 7: App Screens
Various app screens built in Android Studio are shown in Figures 7.1 to 7.6.
[Fig 7.1] Splash Screen
[Fig 7.2] Sign in Screen
[Fig 7.3] Register Screen
[Fig 7.4] Dashboard Screen
[Fig 7.5] Practice Screen - 1
[Fig 7.6] Practice Screen - 2
Step 8: Binding All Together
After building all required screens and programming related functions final app has been ready. The video below shows demo of the app.